




A Complete Guide to Switching Banks
10/30/2026
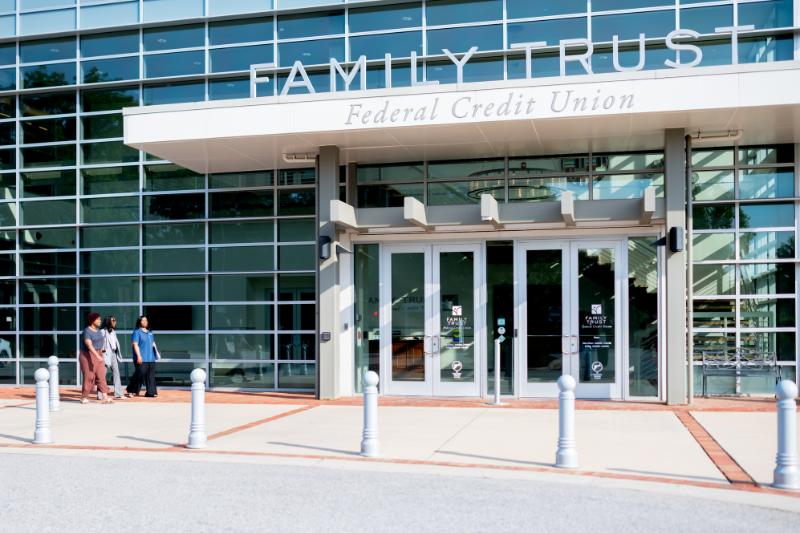
Millions of Americans stay with a bank they're not happy with simply because switching feels complicated. The fear of missed payments, disrupted direct deposits, or something falling through the cracks keeps people in banking relationships that aren't working for them, sometimes for years.
The truth is that switching banks is straightforward when you do it in the right order. This guide walks through every step of the process, from deciding it's time to move to closing your old account cleanly, so you can make the transition without a single missed payment or financial headache.
Is It Time to Switch?
Before getting into the how, it's worth making sure the why is clear. Here are the most common reasons people decide to make a change.
Fees That Don't Feel Fair
Monthly maintenance fees, overdraft fees, out-of-network ATM fees, minimum balance penalties. These charges add up. If your current institution is regularly charging you for basic banking services, there are better options available.
Rates That Aren't Competitive
If your savings account is earning a fraction of a percent while other institutions offer meaningfully higher rates, you're leaving money on the table every month. The difference in earnings between a low-yield and a high-yield savings account compounds over time.
Poor Customer Service
Being treated like an account number rather than a person is a legitimate reason to look elsewhere. Community-focused institutions like credit unions consistently rank above large banks in customer satisfaction and member trust.
You've Outgrown Your Current Institution
Life changes. A bank that made sense when you were just starting out may not have the loan products, services, or local presence you need now. If you're thinking about buying a home, financing a vehicle, or planning for retirement, your financial institution should be a real partner in those goals.
You Want to Support Your Community
Credit unions are not-for-profit and member-owned. That means any earnings are returned to members in the form of better rates, lower fees, and improved services, rather than going to shareholders. For people who value that model, switching to a credit union is both a personal and a community-minded decision.
Bank vs. Credit Union: Understanding the Difference
If you've been banking with a large institution and are considering a credit union for the first time, here's a clear comparison of what to expect.
|
|
Traditional Bank |
Credit Union |
|
Ownership |
Shareholder-owned, for-profit |
Member-owned, not-for-profit |
|
Primary Goal |
Generate profit for shareholders |
Serve members |
|
Fees |
Often higher |
Typically lower |
|
Savings Rates |
Often lower |
Typically higher |
|
Loan Rates |
Often higher |
Typically lower |
|
Membership |
Open to anyone |
Requires eligibility (geography, employer, etc.) |
|
Customer Satisfaction |
Varies; large banks rank lower on average |
Consistently higher ratings |
|
FDIC/NCUA Insurance |
FDIC insured |
NCUA insured (equivalent protection) |
|
ATM Access |
Varies by institution |
Often part of shared network |
|
Community Focus |
Limited |
Central to the mission |
Credit union deposits are insured by the National Credit Union Administration (NCUA) up to $250,000 per depositor, the same protection level as FDIC insurance at banks. Your money is equally safe.
To join a credit union, you typically need to meet membership eligibility requirements. At Family Trust Federal Credit Union, membership is open to anyone who lives, works, worships, or attends school in York County, South Carolina, and select surrounding areas.
What to Do Before You Start
Preparation is what makes a bank switch smooth. Rushing into it without a clear inventory of your financial connections is where most problems come from.
Build Your Financial Inventory
Pull the last 90 days of transactions from your current checking account and make a complete list of every recurring item. This becomes your master checklist.
Incoming deposits to track:
-
Payroll direct deposit (employer)
-
Government benefits (Social Security, disability, veterans benefits)
-
Tax refunds (IRS direct deposit setting)
-
Any other regular ACH credits
Outgoing automatic payments to track:
-
Rent or mortgage
-
Utilities (electric, water, gas, internet, phone)
-
Insurance premiums (auto, health, life, renters/homeowners)
-
Loan and credit card payments
-
Subscription services (streaming, gym, software, meal kits, etc.)
-
Memberships and dues
-
Charitable contributions set up as recurring payments
Missing even one of these during a switch can lead to a late fee, a lapsed insurance policy, or a ding on your credit. The inventory step is the most important thing you can do before changing anything.
The Step-by-Step Process
Switching banks safely is an order-of-operations problem. The sequence below protects you from disruption at every stage.
Step 1: Research and Choose Your New Institution
Before you open anything, know where you're going. Compare institutions on:
-
Monthly fees and how to avoid them
-
Interest rates on checking and savings accounts
-
Loan rates if you anticipate borrowing
-
ATM network and access
-
Mobile and online banking features
-
Branch locations and hours
-
Customer service reputation
If you're considering Family Trust, explore our personal checking accounts and personal savings accounts to see what's available, and check our branch locations across York County and the Upstate.
Step 2: Open Your New Account
Open the new account before doing anything else with the old one. Do not close or change anything at your current bank until your new account is active and funded.
To open an account at most institutions, you'll need:
-
A valid government-issued photo ID (driver's license or passport)
-
Your Social Security number
-
An opening deposit (the amount varies by institution and account type)
-
Your current address
Many institutions allow you to open accounts online in minutes. Others may require or prefer an in-person visit. At Family Trust, you can become a member and open accounts online or at any of our branch locations.
Step 3: Move Your Savings First
If you're switching savings accounts, move that balance first. Savings accounts have no automatic payments attached, which means there's zero risk of a disruption. This step also starts earning you better rates immediately while you work through the rest of the transition.
Step 4: Redirect Your Direct Deposit
Contact your employer's payroll department and provide your new routing and account numbers. Many employers use payroll platforms like ADP, Workday, or Paychex that allow you to update this information yourself through an employee portal.
A few important notes:
-
Direct deposit changes typically take one to two full pay cycles to take effect
-
Confirm that your first paycheck has actually landed in the new account before making any further changes
-
If you receive Social Security or other federal benefit payments, update your direct deposit at SSA.gov
-
Update your IRS direct deposit information on your next tax return
Keep enough money in your old account to cover expenses during this transition period. Don't move everything over until you've confirmed the new deposit is working.
Step 5: Update Automatic Payments One at a Time
Work through your financial inventory and update each recurring payment to draw from your new account. Do this methodically, one at a time, and mark each one complete as you go.
Some payments update immediately. Others, particularly insurance companies and loan servicers, may take a full billing cycle to process the change. Update these well in advance of their next due date, not right before.
Step 6: Keep Both Accounts Open and Funded
Once your direct deposit is redirected and you've updated your automatic payments, keep both accounts open and funded for at least one full billing cycle, ideally two. This buffer catches any forgotten payments or stray transactions that still route to the old account.
Monitor both accounts closely during this period. If anything unexpected hits the old account, you'll have funds there to cover it without an overdraft.
Step 7: Close Your Old Account
After at least one full billing cycle with no unexpected activity on the old account, you're ready to close it. Here's how to do it cleanly:
-
Confirm all transactions have cleared. Review the account history and make sure no pending charges, checks, or transfers are still outstanding.
-
Transfer your remaining balance to your new account. Don't bring it to exactly zero before the formal closure, as some banks may charge fees that could push the balance negative.
-
Contact your old institution to close the account. This can often be done by phone, online portal, or in person depending on the institution's policy.
-
Request written confirmation of closure. Get something in writing, whether an email or a mailed letter, confirming the account is fully closed and the balance is zero.
-
Destroy old checks and debit cards connected to the closed account. Shred or cut up anything with the old account number.
-
Save your final statement somewhere secure for at least a year. You may need it for tax purposes or if a dispute arises later.
Common Mistakes to Avoid
Even well-prepared people sometimes hit avoidable snags. Here's what to watch out for:
Closing the old account too early. This is the most common mistake. If a forgotten autopay hits a closed account, the bank may reopen it, charge overdraft fees, and report negative activity. Keep the old account open and funded until you're confident everything has moved.
Moving everything at once. A staged approach, savings first, then direct deposit, then autopays one by one, is far safer than trying to switch everything simultaneously.
Forgetting annual or infrequent payments. Quarterly insurance bills, annual subscriptions, and yearly membership renewals are easy to miss when reviewing 90 days of transaction history. Think about what bills come due less frequently and make sure those are updated too.
Not confirming the new direct deposit actually worked. Always verify that your paycheck or benefit payment landed in the new account before doing anything else. Don't assume it worked.
Leaving a negative balance behind. If your old account has outstanding fees at the time of closure, the bank can send that balance to collections, which can affect your ability to open bank accounts in the future. Resolve any negative balance before closing.
What to Expect From Your New Institution
Once the transition is complete, take some time to set up your new account the way you want it.
-
Enroll in online and mobile banking. Familiarize yourself with the platform so you know how to transfer funds, pay bills, and check balances.
-
Set up transaction alerts. Alerts for purchases, deposits, and low balances keep you aware of account activity in real time.
-
Explore available services. Your new institution may offer products and services your old one didn't, from better savings tools to lower-rate loans to financial counseling.
-
Update your records. Make note of the new routing and account numbers somewhere secure so you have them on hand when needed.
At Family Trust, members have access to online and mobile banking, mobile deposit, bill pay, and a full suite of financial tools from day one.
Your Complete Switching Checklist
Print or save this checklist to stay organized throughout the process.
Before You Start
-
Review 90 days of transactions and build your financial inventory
-
List all incoming deposits
-
List all outgoing automatic payments
-
Research your new institution
Opening Phase
-
Open new account
-
Fund new account with initial deposit
-
Transfer savings balance (if applicable)
-
Obtain new routing and account numbers
Transition Phase
-
Submit direct deposit change to employer
-
Update government benefit direct deposit (SSA.gov if applicable)
-
Update all automatic payments one by one
-
Confirm first paycheck landed in new account
-
Monitor both accounts for one to two full billing cycles
Closing Phase
-
Confirm all transactions have cleared from old account
-
Transfer remaining balance to new account
-
Contact old institution to formally close account
-
Obtain written confirmation of account closure
-
Destroy old checks and debit cards
-
Save final statement for your records
Ready to Make the Switch?
Family Trust has been a financial home for York County families since 1957. We're not-for-profit, locally focused, and here to put you first, not a bottom line. Membership is open to anyone who lives, works, worships, or attends school in York County.
Explore our personal checking accounts, personal savings accounts, and the full range of member services available to Family Trust members. Stop by any of our branch locations across York County and the Upstate, give us a call at (803) 367-4100, or become a member today. We'd love to welcome you.